Hello Jewelry Aficionados!
Here are some photos showing the process I used to create the pendant I designed in the last post.


I then carefully cut out the shape using a jeweler's saw. I'm always surprised by how quickly this process actually takes. One would think that it would take lots of time and several saw blades, not to mention sore hands, but since sterling is relatively soft, it cuts right through.
 The piece as soon as it is free. You can see where I started each of the cuts. Try to keep these to a minimum, as you can see there is extra metal that now has to be filed away (and wasted) at each of those points (the bottom especially).
 After using my handpiece with green stones and white rubber wheels along with a variety of different files, here is the smoothed piece, ready to be knocked around a bit with my hammer. Right now it is very 2-D, and the design calls for a more 3-D shape, so I need to not only hammer in the texture, but I need to form it into a rather complicated curve.
 I say complicated curve because each one of the arms is curved and domed, as is the piece as a whole. I ended up hammering on my former models as well as an old 2x4, working to end up with the *PERFECT* shape.
 The next step involved soldering on all the settings for the stones. I used premade settings. There are three sizes of bezel cups, and 3 snap settings for 4mm CZ's. The trick was to set them successfully without melting the cups. Since the pendant base is large and relatively thick, it acts as a pretty significan heat sink, so it has to be heated thoroughly before any flame is directed onto the settings, or they will melt in no time.
 After a couple of hours in the pickle pot, the oxidation from the soldering process is gone, leaving a matte finish . It's now ready to set the stones.
 The onyx cabochons are set in their cups waiting to be set. The edges of the bezel cups had to be shortened somewhat so that there wouldn't be a lot of metal showing. Also, since I used high-domed cabochons, they were pretty steep, which would have made it difficult to bend/fold over that much metal without it creasing on itself and looking unsightly.

After a nervewracking afternoon of cutting, setting, and a whole lot of polishing (I heard somewhere that the amount of time spent on polishing usually ends up being equal to the amount of time spend on everything else. I agree.), the pendant ended up a success. Next step? The earrings.
Peace! Pastel Guy

This first one shows the pattern cut out of paper and laid on the silver sheet. I then used a fine point Sharpie Marker to transfer the design. Then, so the design wouldn't be lost with finger smudges, I took an awl and scored along the line, making a permanent mark in the sterling.

I then carefully cut out the shape using a jeweler's saw. I'm always surprised by how quickly this process actually takes. One would think that it would take lots of time and several saw blades, not to mention sore hands, but since sterling is relatively soft, it cuts right through.
 The piece as soon as it is free. You can see where I started each of the cuts. Try to keep these to a minimum, as you can see there is extra metal that now has to be filed away (and wasted) at each of those points (the bottom especially).
 After using my handpiece with green stones and white rubber wheels along with a variety of different files, here is the smoothed piece, ready to be knocked around a bit with my hammer. Right now it is very 2-D, and the design calls for a more 3-D shape, so I need to not only hammer in the texture, but I need to form it into a rather complicated curve.
 I say complicated curve because each one of the arms is curved and domed, as is the piece as a whole. I ended up hammering on my former models as well as an old 2x4, working to end up with the *PERFECT* shape.
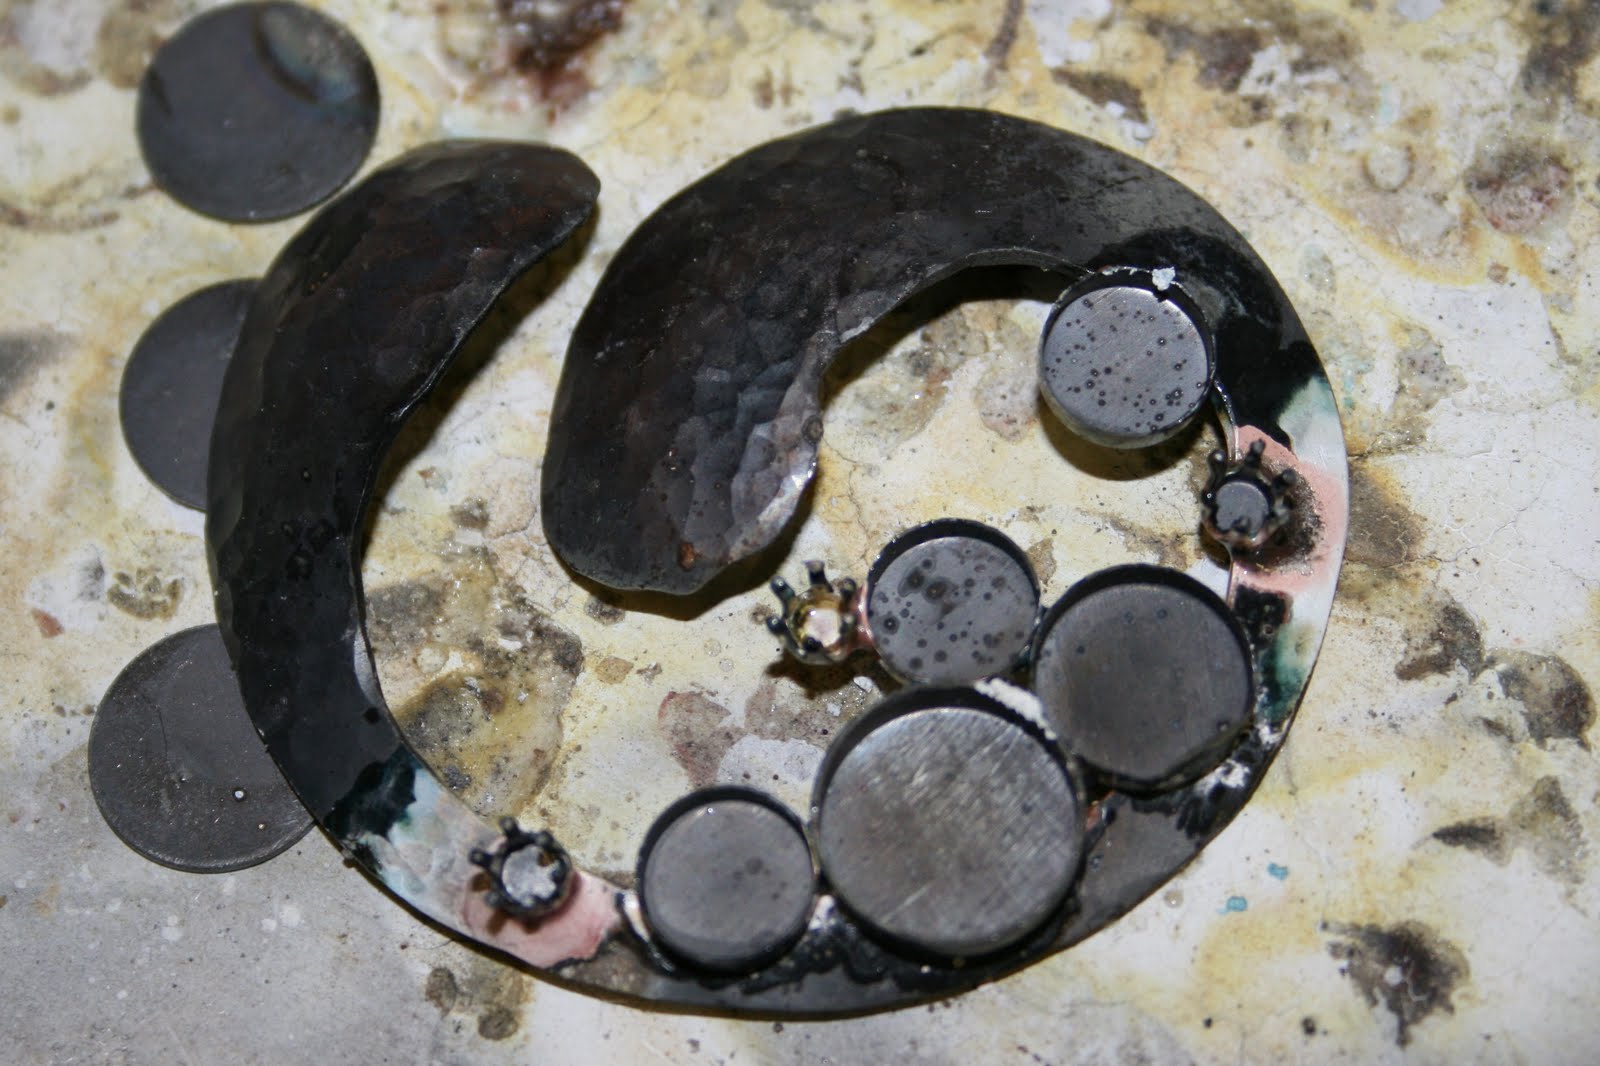 The next step involved soldering on all the settings for the stones. I used premade settings. There are three sizes of bezel cups, and 3 snap settings for 4mm CZ's. The trick was to set them successfully without melting the cups. Since the pendant base is large and relatively thick, it acts as a pretty significan heat sink, so it has to be heated thoroughly before any flame is directed onto the settings, or they will melt in no time.
 After a couple of hours in the pickle pot, the oxidation from the soldering process is gone, leaving a matte finish . It's now ready to set the stones.
 The onyx cabochons are set in their cups waiting to be set. The edges of the bezel cups had to be shortened somewhat so that there wouldn't be a lot of metal showing. Also, since I used high-domed cabochons, they were pretty steep, which would have made it difficult to bend/fold over that much metal without it creasing on itself and looking unsightly.
After a nervewracking afternoon of cutting, setting, and a whole lot of polishing (I heard somewhere that the amount of time spent on polishing usually ends up being equal to the amount of time spend on everything else. I agree.), the pendant ended up a success. Next step? The earrings.
Stay tuned.
Peace! Pastel Guy


